Category Archives: Year 12

Who’s your daddy?

I’m making this the last Burble of this Academic Year. It’s partly a feeling that inspiration is close to running on empty and partly sheer exhaustion. I need a break – as I’m sure you all do too.

I was going to just post some of my favourite pictures of recent work….

…like this spectacular mitosis slide found by a Year 12 student preparing a garlic root tip squash with Orcein stain… (and captured with the Celestron digital microscope imager)

mitosis

… or this fabulous gel, just one from our best ever results with protein electrophoresis. I’m adding to our formidable supply of gel tanks, acquiring enough vertical versions so that we can run more appropriate protein gels with polyacrylamide, but the one on view here is a bog-standard horizontal agarose.

IMG_1370

OK, I wasn’t too impressed with the forensic inquiry of the students – 4 lanes of chicken breast vs 4 lanes of chicken nugget – couldn’t they have included some other parts of the chicken for comparison?!?! – but look at the bands! Photographing with an i-phone or an i-pad also allows for instant fiddling with the picture,  making it black and white and adjusting the contrast to make the bands clearer.

But today was Year 7 Baboon Day, my favourite day of the year.

The full details of this lesson with all the relevant resources can be found here:

Who’s Your Daddy?

So having already role played cuckoos and host birds and rats in Skinner boxes, they now get to role play baboons, whilst half a dozen students try to figure out what’s going on, collect molecular data by “darting” the baboons to get “blood samples” and so on.

All good fun and, as usual, they made splendidly realistic baboons. But the best features of a lesson can sometimes be the unexpected ones. The students cast as scientists had done a great job as field biologists, but were having particular difficulty determining the paternity of the baby baboons. The mothers and babies were fine – the DNA profiles were consistent with their field observations. But who had fathered the offspring?

I couldn’t understand the difficulty. Once you realise that all the bands from a baby must either match bands in the mother or father, so you have to account for all bands present, it’s just a simple logic problem. Isn’t it? But, no, they were baffled. What was the problem? Where was the mental block?

And then one of them had a flash of insight.  Hang on, she said, are baboons different to humans? Can one father have several “wives”?

It was a brilliant moment, a lightbulb moment, one you want to capture and bottle and share with the world. They had been trying to match up mothers and fathers and offspring as discreet, family units. This hadn’t worked and they were getting frustrated and confused. Suddenly, with this new way of looking at the world,  they could make sense of it all. They rapidly worked out that the alpha male was not only the father of 4 of the 6 offspring, but had (shock horror!) sired them with 4 different females.

This is quite sweet – such innocence! such well brought-up students! – but I love anything that startles students out of pre-conceived views of the universe. They had framed baboon society as being essentially the same as conventional, middle class, western human society, and subconsciously made certain assumptions. Which didn’t match the evidence. So something had to give.

Before they left for home, I asked them what they had learned in the lesson. The list was long – dominance hierarchies, stress hormones, grooming behaviour, DNA profiles and how to interpret them, baboon society, field biology, how to communicate without speaking….

And they hadn’t written a single thing down.

Have a great summer. I hope to be back in the autumn with more ideas to share.


mit

Blindness, insanity and death

Tell them stories…

I love stories. They provide context. They make things memorable. They are ideal learning tools.

I also love a bit of theatre. Teaching is, at least in part, a performance art.

This lesson combines the two. The content isn’t terribly original, but even the weaker students remember every single detail… So listen up! I shall be testing you later…

So, I say, did any of you go on the Duke of Edinburgh expedition?

An excited babble of reminiscence follows.

Did you stay in a tent? Was it really cold and uncomfortable?

They compete for the most uncomfortable story.

Did you cook your own food? Yes? What did you have? Pasta? Most of them will have had pasta. What did you cook it on?

A pause to remember the name, and then, a Trangia!

Right, a Trangia. What’s the fuel for a Trangia? That purple stuff? Anyone remember the name? Methylated spirits. Did any of you spill it in the pasta? What did it taste like? Vile!!!!

Why does it make such a great fuel? We talk about energy content and flammability and I light a little evaporating basin full of meths.What’s the flammable component? Yes, that’s right. It’s methanol. An alcohol. A clear, colourless liquid that tastes like its close cousin, ethanol.

So why are methylated spirits bright purple and taste vile?

Do they add stuff to it? Indeed they do. It’s not a great idea to drink it.

I direct them back to the burning meths.

Note the flame, I say. Orange tips. Very useful.

Why?

Ah. So we talk about methanol and ethanol and I tell them of my time in Uganda where a jerrycan of the local hooch -waraji, or banana gin – would set you back about 50p (50p for 30 litres of neat spirits!). But before we started making our waraji and passion juice cocktails, we always poured a little on the floor and lit it. If it burned with a clean blue flame, all was well. But orange tips to the flames? We used it in the paraffin stoves (it was much cheaper than paraffin).

Why?

Well, a clear blue flame indicates that it’s ethanol, the stuff we call alcohol, and which our livers can break down to carbon dioxide and water.

But an orange flame indicates methanol. Our livers break down methanol too, but they break it down to something else.

I produce my next prop, a mouse pickled in a jar of formaldehyde.

Lots of good reactions to this, mainly sympathy for the mouse.

Look at this mouse, I say. It’s perfectly preserved! It will never rot! It will swim in its little bath of formaldehyde for all eternity. But how good is it at being a mouse? What do I mean? You know, mousey things. The squeaks and the scurrying and the nibbling cheese stuff that mice do. How mousey is it? Not at all. It’s bloody rubbish at being a mouse.

And this is the problem with drinking methanol. Your liver cheerfully metabolises it, but instead of producing water and carbon dioxide, which your body can deal with, it produces formaldehyde. And this travels round the body. And starts to pickle it. Starting with your retina. Your retina becomes perfectly preserved! It’ll last forever! It’s just not very good at being a retina any more. Then your brain. Blindness, insanity… it’s not a good way to go. If you’re ever in Uganda, I say, or, indeed, anywhere where people distil their own hooch (i.e. pretty  much everywhere), remember the orange flame test!

They like the story, they love the mouse, they enjoy the anecdotes, they are happy to remember character building DoE expeditions. But where’s this going…?

I often digress at this point to discuss the power of addiction. Who drinks methylated spirits? Er, no-one? But they’re wrong. And they shake their heads in astonishment at the thought of someone needing an alcohol high so badly that they’ll over come the repulsive taste and the gruesome side effects…. But then it’s time to get back to the plot…

So, I say, here’s the punchline. The enzyme that breaks down ethanol to water and carbon dioxide is called alcohol dehydrogenase – and this same enzyme is the one that breaks down methanol to formaldehyde. Which means, I say, increasing the volume and emphasis for dramatic (some might say melodramatic) effect, every DoE leader must guard against possible methanol poisoning, and carry in their medical kit a large bottle of…. what?

And they see it. They really do. They’re also delighted. Every DoE leader should include in their risk assessment and medical supplies, a large bottle of vodka! They think this is hilarious. Voddie! On DoE!!! But they also get the science. Swamp the alcohol dehydrogenase with ethanol and the active sites will be too busy to get round to metabolising the methanol (which can be safely excreted on the breath, or in sweat, or in urine….).

Time for a few notes and diagrams – as Feynmann used to say, once you’ve understood it, you can write it down.

To my delight, this year, a couple of Year 12s compared the formula of the two alcohols and wanted more rigour on the enzyme (what does the name tell you about its job?), and were able to work out that, yes, if you strip a couple of hydrogens off methanol, CH3OH, you do get formaldehyde, CH2O. It meant we had to explore the ethanol pathway in more detail, but that was fine too.

Stories…. tell them stories.

50 Shades of Pink

Just a quickie this week as it’s that time of term.

The new OCR spec and Cell Membranes. The effect of temperature on membrane permeability is still there, and we’ve already 5-PAGGED (i.e. covered Practical Activity Group 5) with beetroot discs and colorimeters. Here’s my version of this old favourite.

beetroot practical updated 2015

It does strike me that this is a perfect example of allowing students to bring their phones to lessons in order to take photos of their work. By printing off the picture of their row of pink/red test-tubes and including it with their graph and table in the PAG portfolio, it’s excellent evidence for the OCR moderators to see on their school visit.

Anyway, in addition to the temperature effect, there is now the effect of solvents. So why not do this…

Return of the Beetroot. Membranes and Solvents

Depending on the ability of the class, you could get them to predict the effect, or explain their results after the event. Linking it to the use of soap for killing bacteria also makes them apply their thinking.

It works really quickly! They’ll see an effect within 5 minutes, if you like, and there will certainly be enough colour by the end of the lesson for a lovely photograph.

IMG_0861

Time for coffee and pain au chocolat. Have a good week!

Sheep Dash and Water update

Last week I wrote about a last minute lesson plan emerging from a fog of exhaustion and panic (a Groundhog moment from the first year of teaching where every single lesson is like that!). I’m pleased to report that the lesson in question was a great success, the Year 8s enjoyed the activity and could almost immediately understand and explain the difference between their two sets of results ( see attached exercise here Sheep Dash experiment). I also made use of the class skeleton and a spare Chromebook to talk them through the sequence of events that take place from the moment that the sheep makesits dash, to their successfully(or not!) clicking the dart gun.

IMG_0830 IMG_0827

I’m following that up with a simplified version of Bill’s marvellous Brain Injury exercise (also see last year) which is an excellent example of how you can turn what could be a dull lesson in information delivery into a lesson of learning and discovery. It’s based on the fact that most of what we know about brain function was originally deduced from linking an injury to a specific region of the brain (stroke being the classic example), to the symptoms that follow. Students “damage” localised areas of the brain and are told the resulting symptom(s) – they then try to infer what that part of the brain does. (brain injuries) It’s also a great illustration of the potential of Powerpoint, where the direction of the lesson is determined by the students’ choices, not by the linear construction of the slideshow. Have a go! It’s strangely addictive, even when you know the answers….

The new Year 12s are adjusting to life at A-level. I talked last Year (22nd October) on my introduction to Water (which is also my introduction to the A-level course). One girl this year got the HIJKLMNO(5) clue in less than a second (literally!) which given that I normally expect this to take 5-10 minutes, rather threw my lesson plan. But once the water circus and the water properties homework is out of the way, I then go back to the importance of the solvent properties, particularly the idea that metabolic reactions take place in solution. I talk about the origins of life. I talk about Miller and Urey and show them this (amino acids intro it’s another one of Bill’s splendid animated Powerpoints), stressing the idea that in certain conditions, complex organic molecules can arise spontaneously out of simple ones. But there’s a problem….

I herd them all into a corner of the lab. You’re all complex organic molecules, I say, amino acids and nucleotides and stuff, all in solution, pouring out of that cold vent in the ocean floor. The rest of the lab is the big wide ancient ocean, 3.5 billion years ago. If you could only bump into each other, we could get life kick started! But what happens….?

It’s lovely. They all drift apart, sub-consciously (perhaps) recalling Year 9 lessons on Diffusion, until they’re evenly spread throughout the “ocean”. I stop them. What’s happened???? Why can’t you bump into each other???? Oh no! Life is never going to happen… unless…. What else must we have? They instantly see the need for some kind of enclosing structure to stop them diffusing irrevocably apart. What do we call that enclosing structure? A cell membrane! Aha! And what property, I say, must a cell membrane emphatically NOT have????

This last question usually requires a few seconds thought…. Someone might suggest “permeability”, which is fine – I praise the answer and then park it for a future lesson – but what else? Given what they’ve just done, what property must the membrane NOT have? Yep, that’s right, it must not be soluble in water. Which means it must be made out of something…? Hydrophobic. Can they think of any common hydrophobic organic molecules….?

This launches us into Lipid chemistry and the background to cell membranes, one of my favourite topics on this or any other specification.

I structure it this way because I like the story, the logical sequence (rather than sticking water into a random lesson half way through the course), and the evolutionary context. I like the way it stresses the primary role of a membrane – which helps when we come on to compartmentalisation – and I always like getting them up out of their chairs and doing something, even if it’s just role-playing an amino acid in an ancient ocean….

It’s alright, ma, I’m only bleeding

The Biotutors discussion forum was getting hot and bothered last week over blood. Someone had wondered whether it would be OK to allow a student to test for blood glucose levels. The advice offered was almost unanimous – NO! Absolutely not! Do not touch with a barge pole! Too dangerous! So many ethical issues! No, no, no, no, NO.

All of which fills me with despair. After all, what could be more interesting, what could be more motivating or exciting, than looking at your own blood? Allowing and enabling students to do this should probably be a requirement of the A-level course. It’s very easy, it’s completely safe and it is utterly fascinating. Risk assessment? Yes, it needs to be sterile (easy). It’s advisable to get parental permission in advance (try this letter template blood typing letter for blog). It obviously has to be an “opt in” activity (in 15 years, I’ve never had a student opt out). Sometimes a student faints (be aware of this, watch out for it, ask them to alert you if they start feeling faint, and deal with appropriately if it happens). But there is absolutely no reason why you shouldn’t do it. Still not sure? Well, the ASE and CLEAPPS are both perfectly happy with it and have published procedures for taking blood samples safely. You can do it!

Now, if you’ve never done this, I can see why it might seem a bit intimidating, so it obviously makes sense to trial it on yourself/other teachers before rolling it out for a class. You also need to think about the class. I’m happy to do it with my Year 10s – you might prefer to keep it for the 6th form.

I also demo it on myself in the lesson, partly to show that I’m not asking them to do something I can’t or won’t do myself, but also to run through the protocol for them all to see. You can make this reasonably dramatic and play it for laughs (if you’re like me).

So I tell them about the bad old days when you literally had to summon up the nerve to jab yourself with a lancet. It wasn’t easy! Pushing the button on a plastic spring-loaded pre-set single use disposable captive lancet (http://www.expresschemist.co.uk/Accu-Check-Safe-T-Pro-Plus-x200.html) is a doddle by comparison.

I say they need to choose a “sacrificial” finger. I reassure them that sensation will return in a year or two. Probably. The disposable lancets have 3 depth settings, so you can determine the length of the steel blade that will plunge into your flesh – …. I ask my class to select the appropriate length for their teacher. They take great delight in always choosing the longest one.

Use the side of your finger. The pad of the finger has far too many nerve endings and will be quite sore afterwards. The top of the finger, just behind the nail, just seems too close to the bone! The side of the finger, about half way along the last phalange, is nice and fleshy, has lots of capillaries, but is relatively un-sensitive.

It’s good to shake your arm thoroughly before stabbing yourself, to encourage blood flow. Sterilise the side of your finger with the sterile cleansing wipe (https://www.eurekadirect.co.uk/Hygiene-Infection-Control/Wipes/Alcohol-Free-Wipes/Sterile-Alcohol-Free-Cleansing-Wipes). Place the lancet firmly against the stab site on the sacrificial finger…

… and then….

… press the button. It’s instantaneous. You might feel a little jab, you might feel nothing at all, but it’s actually a huge anti-climax after all that build up. But! You should have blood. If it seems a tad slow emerging, then squeezing, or “milking” your finger can encourage the flow; after all, you’re not going to need very much. Or you might be a bleeder – take what you need and then stop the flow (pressure followed by a plaster).

So, you’ve got blood. What are you going to do with it?

The obvious thing is to look at it. I do this in year 10, when they just look at the red blood cells. All they need, apart from their blood, is a slide, a drop of saline, a coverslip and a microscope. And simply watching the little biconcave discs spinning in the plasma (you actually see the cells in 3D, which you don’t get from a prepared slide) is pretty compelling, even soulful. It also gives an immediate impression of the tiny-ness and numerous-ness of cells – there are at least 4 million cells per micro-litre, but even at x400, they are very, very small.

I do this again in Year 12, when they learn to stain with Leishmans’ to show up the white blood cells. What are the relative numbers, red vs white? How many different types of white blood cell can they identify? Using haemocytometers is a good option here, too. The motivation levels are sky high.

So looking at blood is very cool. But there’s more.

Why not measure blood glucose? It couldn’t be easier – after all, it’s something diabetics routinely do several times a day. When I’ve had a diabetic student in the class, they’re usually only too delighted to talk about their condition, demonstrate what they do and explain how it affects their lives. A simple electronic blood-glucose monitor, which you can pick up in Boots, does the job admirably (though you need to check every year that the disposable test strips haven’t expired).

This is what I do.

I like to use a volunteer who measures their blood glucose and then drinks a Coke/eats a Mars bar. We record the time and the mmol/litre reading on the board. Then it’s time to review digestion/absorption. What do they think the next reading will be and why?  When we’ve finished this discussion, about ten minutes later, we test the same student again. Whoosh! Look at that sugar spike! I always make this very dramatic. Oh no! If we exceed 11 mmol/litre then it’s hyperglycaemic coma and death!!! Aarrghhhh!!!! This prompts lots of good questions and discussion about why high glucose levels are dangerous. Hmmm, time to check again. Oh. It’s falling. Hurray! They’ll live!

But what’s going on?

Again, record the data, time and concentration and start talking about what is happening inside that student at that very moment. With 4 or 5 more measurements before the end of the lesson, all the students have the data plot a suitable graph for homework, adding annotations to explain/describe what’s actually going on in the volunteer’s body along the line. I also ask them to extrapolate the line to show how they think it will change over the next 6 hours. It’s a brilliant way of testing their understanding, forcing them to think about data gathered in real time. What’s not to love?

And then there’s blood groups. I use this as the taster lesson for Year 11s thinking about A-level Biology. The blood typing kits from Blades (http://www.blades-bio.co.uk/proddetail.asp?prod=CBK014) are very easy to use and interpret. And what a brilliantly synoptic topic! We’re talking about membranes and membrane-proteins and genetics and inheritance and multiple alleles and antibodies and resistance to cholera and Charlie Chaplin and allele frequency and selection pressures and Anne Boleyn and the utterly brilliant blood typing game… (http://www.nobelprize.org/educational/medicine/bloodtypinggame/game/index.html). Difficult, challenging, fascinating. Biology, in other words.

Next week, pregnancy!

Strawberry and Coconut genetics

I forget who gave me the idea (I’m afraid I can’t claim it as my own), but if you’re currently extracting DNA from onions with fairy liquid (as my poor, weeping Year 12s used to do), then I’d recommend switching to strawberries and coconut shampoo as I did this year. Smells delicious, looks spectacular DSC_8169 (a little like you’ve liquidised a hamster), and produces prodigious quantities of what they’re happy to accept is DNA (though, truth to tell, most of the white goop is almost certainly pectin).

But onions (cheaper), strawberries (make sure you use coffee filter papers – the goop is too thick to go through standard lab filter paper) or frozen peas (frozen peas, along with onions, are the recommended vegetable of choice for the NCBE), there are ways of telling this story. I saw a teacher recently end the Year 12 Nucleic Acids topic with the DNA extraction exercise, reflecting their belief that practical work is a “just a bit of fun”, tagged on at the end if you’ve got time after the serious business of delivering immaculate notes and diagrams. By then, however, the end product comes as something of an anti-climax because they already know all about it. So what’s the point?DSC_8172

I prefer to do it like this…

Start with the DNA extraction. It’s fun, it’s messy, you can throw in some interesting questions on why you need to use detergent, 60’C water baths, protease and ice cold ethanol, and they end up with great goopy snot-like dribbles of “DNA” – several 1000km of the stuff if you reckon on 1m per cell.

Again, I should stress that if you want a higher percentage of real DNA, then onions or frozen peas are better, but given that we’re not going to sequence/amplify/carry out X-ray crystallography with the extracted material, I’m happy with my strawberries. The key learning point, apart from interpreting the extraction design, is that cells contains loads of this stuff, so it must have some really important function.

DSC_8175

OK, so there it is, DNA. What next? Well, there’s obviously loads of it, so it presumably has some importance to cells, but what exactly does it do and how exactly does it do it? They’re motivated to find out more so I send them off to think through some of the classic experiments that identified DNA as the molecule of inheritance.DNA experiments exercise

Next lesson, it’s time to explore the structure. You could just tell them, of course, but why not get them to work out the structure for themselves? I do no more than tell them that nucleic acids are polymers of nucleotides, and sketch the structure of a simplified nucleotide for them. They then do exactly what Watson and Crick did – cut out card models and try to fit them together.DNA model instructions DNA model parts (tip: make sure your sugar/phosphates are on a different colour card to your organic bases). Again, I must cite my sources – this is another of Bill’s typically brilliant creations.

DSC_8204

What makes this wonderful to watch is that even if they can remember A-T and C-G from (i)GCSE, they can now see why it has to be that pairing – A to T to 2, C to G to 3 (say it out loud), is my tip for remembering the number of hydrogen bonds.

DSC_8203

We then bring all the nucleotides together in a large class molecule…

DSC_8202…and I play them the clip from DNAi where Jim Watson recalls the moment when they saw it  – the morning of February 28th, 1953. I tell them he got a Nobel prize for doing what they’ve just done – if you make your students feel brilliant, then they will do brilliant things.

We go back to the model and discuss it. What can they see? They can see that, to put it together, the two strands have to run anti-parallel. They can see the symmetry that the purine/pyrimidine pairing gives. It’s easy to point out the 3’ 5’ direction. I mention the footnote to the original Nature paper – “It has not escaped our notice that the specific pairing we have postulated immediately suggests a possible copying mechanism for the genetic material”

Can they see it as well? Yes they can! That base pairing means each half is a template for the other may be half remembered from (i)GCSE, though not with the clarity provided here. The hydrogen bonds which provide such a ready means of unzipping the molecule are also starkly obvious. Their next homework will be interpreting the design and results of Meselson and Stahls’ beautiful experiment. DNA Replication Meselson Stahl prep Meselson Stahl experiments

And so on. We hang our model from the ceiling and attempt to make it 3D and helical. It comes in very useful when explaining PCR to the Year 13s.

In the next lesson, when I finally give them a simplified diagram to label, DNA basic structure the detail they recall and include is fantastic. Because they figured it all out for themselves while I made a coffee and fed the hamsters.

Teddy’s bungee jump

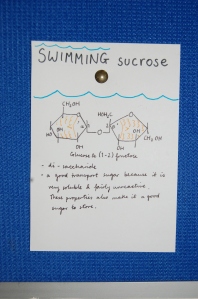
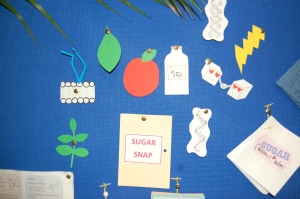
Year 12. Carbohydrates. Sugars and polysaccharides. And a real shock to the non-chemists who despite lots of advice and warnings to the contrary, still manage to look aggrieved when biological molecules start appearing in the lab. I try to keep the pace brisk, so after an introductory lesson on glucose, where they build them with molymods and work out the formation and structure of a glycosidic bond for themselves, they cover all the other sugars with a homework on Sugar Cards (Top Trumps? Dating Agency introductions? Collectable Cards? Their choice!)

DSC_8149

DSC_8151

But if sugar biochemistry can be unpleasant, it’s nothing to the sense of horror when starch and cellulose appear. As if plants themselves weren’t bad enough, now we have to learn about their polysaccharides! Aarrghhh!!!!!

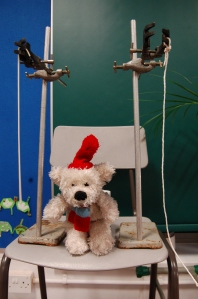
So I start with Teddy. Everyone over here! (a key part of all my lessons is to keep the students on the move). Meet Teddy!

DSC_8155

He’s not had the easiest of lives, starting off as a handy board rubber (note black markings). But as you can see, he’s gamely decided to try a bungee jump. Only thing is, he can’t decide what to use for his rope – should he use a length of string (on the right)? Or should he use a length of spaghetti (on the left)? It’s a tricky one!

Students puzzled, intrigued, deeply amused.

So, what do you lot think? Spaghetti or string? String or spaghetti? Any thoughts? The piece of string? Why? Because it’s stronger.  Really? Well, it’s a good hypothesis, but how could we possibly find out?

So Teddy leaps from the chair safely secured to a piece of string. Tied to a piece of spaghetti, however (and good luck tying a realistic knot with spaghetti!), he plummets to the floor. Just in case they’re not convinced, I ask two students to have a quick tug of war with the string, and then the spaghetti. Yep, that was a good prediction – the string is much stronger.

But why on earth are we comparing string and spaghetti? Isn’t it like comparing warthogs with paint? What do they have in common? OK, they’re a similar shape, but surely that’s it. Anything else? No? OK, start with spaghetti – what is it? Yes, it’s food. What food group? What’s it largely made of? Starch. A carbohydrate. Excellent – great for carbo-blasting before a long race or a big match. Good. And where do we get starch from? Wheat.

All very straightforward. But what about string?

They usually get there pretty quickly. It’s cotton. Also a plant product. Made largely of plant cell walls. In other words, cellulose. Which is another? Carbohydrate.

We can now draw on what they learned from their sugar homework – they recall that starch is a polymer of alpha glucose, cellulose is a polymer of beta glucose – one makes fantastic food  but isn’t something you would make a T-shirt out of, the other makes everything from jeans to string, but isn’t remotely appetising, even with bolognaise sauce. But they’re both made of glucose! How is such a thing possible?

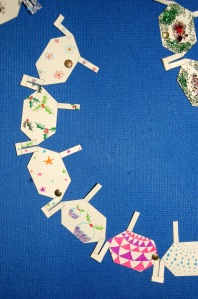
Now they need to build it, to actually see how and why the position of the OH group on carbon 1 can make such an enormous difference. These cut out card monomers building starch and cellulose template (orange for starch, green for cellulose) to enable them to do this. They cut them out and stick them together, carbon 1 to carbon 4, using the pattern shown on the instructions building starch and cellulose instructions and questions. The alphas are easy. But the betas? Some see it instantly, others take a while, but eventually they all figure out that you have to flip every other glucose to make the glycosidic bond work.

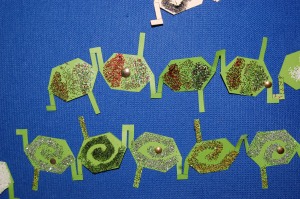
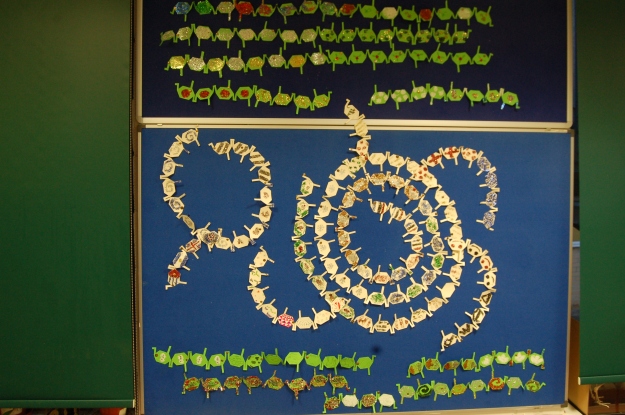
So now they can extend their oligo-saccharides by joining them to other people’s. I encourage liberal use of glitter/decoration to lend a festive touch (we’re closing in on Xmas at this time of term) and to lighten up the subject – heaven knows that plant polysaccharides need all the glitter they can get –

DSC_8146DSC_8147

and now you have a model to illustrate all the other key learning points.  First the shape – the starch just spirals round and round, while the cellulose is a straight line. Now stack the cellulose molecules in parallel – why is this so strong? Lengthen the starch – why is this so great for storing energy? Oh, but there’s a problem with only having 2 available glucoses at any one time. What could we do? They suggest branches. Bingo! Add some 1’6 connections. Put it all up on a display board, cellulose flanking starch to represent a plant cell (-ish), and let them tackle the questions. Encourage them to take pictures of their molecules – good reference for revision.

DSC_8145

Suddenly they’re excited. Are we going to build any more models? Oh yes. Just wait until we do proteins…